It doesn't take much to say "I want you to be here" in a really special way. Invitations, whether for a wedding, baby shower, or a backyard pot luck, are one of the simplest things to personalize!
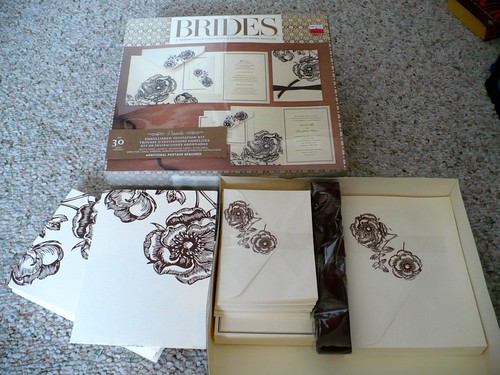 |
I've seen these at both Michael's and Staples.
Too much brown for me though. |
Get your stationary. For our wedding invitations, I went hunting through stationary and craft stores until I found invitation kits on sale. A batch of 30 for $20 and later a batch of 12 for $3 was the perfect start. There was no damage to them and no missing pieces, they simply were last seasons invitations in a clearance section. Score one for the consumer! Alternately, you can take sheets of good quality paper and cut them in half horizontally so you have 5.5 x 8.5 inch sheets. If you use coloured paper, placing slightly smaller white or cream paper on top will give you a gorgeous frame. Don't put it together until after you print your invitations, though, or you will ruin your printer and paper!
 |
| I want ALL of the colours! |
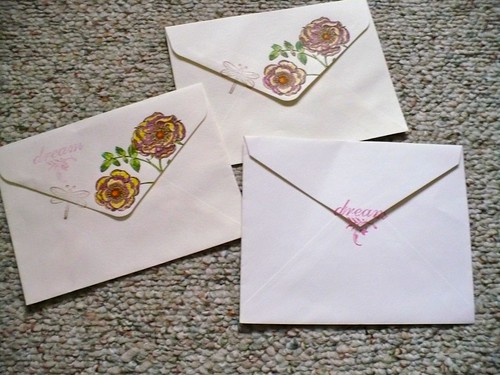
Add colour. Now that you have your invitation kits with their handy online templates, pre-cut paper, and delicate designs, take your markers, water paints, or coloured pencils and proceed to make them the perfect colours to match your theme and whimsy. We hadn't decided on our wedding colours, but after a few experiments on the small RSVP envelopes, we settled on pink, orange, and yellow. That doesn't mean I wasn't able to sneak in touches of purple, blue, and green though!
 |
The bottom ribbon was folded over to hide
where the tape was and give it a touch of class.
You can also make this your front with a
decorative decal over the fold. |
Gather your decorations. Ribbon, stencils, stamps, stickers, flowers, crystals, sequins, lace . . . The possibilities are astounding and completely up to you! I bought my ribbon at Michael's for $1 per 3 meter roll. One roll made 9 invitations and each invitation needed two kinds of ribbon. Considering the amount I needed, it probably would have been cheaper to buy bulk from an online store like
CV Linens (100 yards of organza ribbon for under $6) or
Save on Crafts, but at the time I was not aware of that. See, dear reader? That is why you scour the internet. To learn from the mistakes of others!
Consider stamps. Unlike stickers or seals, you won't have to run back to the store for more when you realize you forgot that uncle in Uzbekistan, then end up buying a 24 pack for just 3 more invitations. Seriously, stamps could easily be your biggest friend. To personalize our invites, I used two stamps: a dragonfly and the words "dream". As you might have guessed, I was very pleased with how they turned out. Again, Michael's dollar bin for the dream stamp and pink colour. A friend let me borrow the dragonfly and brown ink.
Experiment. Arrange your ribbon and other decorations on top of your invitations until you find a layout that works. Keep in mind the actual content of the invitations. As nice as a flower with bees flying around it looks, if the flower covers up the date of the event, the whole invitation is useless. Be practical, then be fearless. Once you know what you want, add that first touch of glue or double sided tape on an invitation. Stare at it. Tilt your head. Try again. Tilt your head the other way. Still look good? Awesome! Keep going.
Don't be afraid to change your mind. I originally had all of the info sheets centred, but upon realizing the perilous journey these little invitations of mine would go through, moved things around once more. I ended up liking this new placement better. If your envelopes are sealed and you decided to add one more bit of gaudiness, don't worry. tDo what you can and I'm sure those who have a bit extra won't brag to those who don't. Which leads me to my biggest piece of advice:
 |
| The same, but different |
Allow for differences. While it would be nice to have an army of identical invitations marching out into the world, this may not be the case. Whether because you couldn't make up your mind or ran out of something and had to improvise, no one but you will know. People see their invitation only, and unless you reveal your secret on the internet where anybody can see (ahem), your secret is safe.
I can't even express how much pressure lifted from my shoulders with this one concept. My invitations are handmade with a personal touch, and I wouldn't have it any other way!
 |
| Happily ever after . . . as soon as you RSVP! |